Walking S-mores- Easy S’mores in a Bag Recipe
Walking S’mores are about to revolutionize your campfire dessert game! Forget fumbling with sticks and precariously balancing melting marshmallows over an open flame. We’re talking about pure, unadulterated s’mores bliss, conveniently packaged and ready to be devoured on the go. Imagine this: the iconic trio of gooey marshmallow, rich chocolate, and crunchy graham cracker, all melded together into a warm, comforting hug of flavor, without any of the fuss. It’s the ultimate crowd-pleaser for camping trips, backyard BBQs, or even just a cozy night in. What makes these Walking S’mores so special? They’re ridiculously easy to make, incredibly customizable, and frankly, just plain fun to eat. Get ready to ditch the messy skewers and embrace the genius of s’mores in a bag!
Why You’ll Love These Walking S’mores
The Ultimate Campfire Treat, Reimagined

Walking S’mores (S’mores in a Bag)
Get ready for a campfire classic with a twist! These Walking S’mores, also known as S’mores in a Bag, are the ultimate no-mess, portable treat. Whether you’re hiking, camping, or just enjoying a backyard adventure, these individual s’mores packs are a game-changer. Forget the sticky fingers and the struggle to assemble over a flickering flame. With this simple recipe, everyone can have their own perfectly melty, chocolatey, marshmallowy delight without any fuss. They’re incredibly easy to assemble and, best of all, they require absolutely no cooking! Perfect for kids and adults alike, these portable s’mores are destined to become a new favorite.
Ingredients:
- 7 Teddy Grahams Snack Packs
- 1 cup miniature marshmallows
- 3 Hershey chocolate bars
Instructions:
Let’s get started on creating your delicious Walking S’mores! This recipe is designed for ultimate ease and portability. You’ll want to gather all your ingredients and have a clear workspace. The beauty of this recipe is its simplicity, making it a fantastic activity to do with kids, or to prepare ahead of time for a party or outing. Each snack pack will yield one delicious s’more.
Preparation and Assembly
1. **Gather Your Supplies:** Before you begin, make sure you have everything you need. This includes your 7 Teddy Grahams Snack Packs, 1 cup of miniature marshmallows, and 3 Hershey chocolate bars. You’ll also need small resealable bags (like sandwich bags or snack bags) to hold your assembled s’mores. If you’re making these for a group, you might want to have a few extra bags on hand. It’s also a good idea to have a surface to work on that’s easy to clean, just in case a marshmallow or two decides to escape!
2. **Break Down the Chocolate:** Take your 3 Hershey chocolate bars and carefully break them into smaller, individual squares. The standard Hershey bar usually breaks into 12 or 15 squares. You’ll want enough chocolate pieces to fit comfortably within your snack packs. Aim for about 2-3 squares per s’more, depending on the size of your snack packs and how much chocolate you like. This step ensures that each s’more has a good balance of chocolatey goodness. If the chocolate is a little hard to break, you can gently tap it on a counter or use the edge of a butter knife to help score it before snapping.
3. **Assemble the Base:** Now comes the fun part of building your s’more. Open up one of your Teddy Grahams Snack Packs. You’ll find that each snack pack contains several Teddy Grahams, which will serve as the delicious graham cracker base for our s’mores. Carefully arrange about 3-4 Teddy Grahams at the bottom of a resealable bag. You want to create a single layer that will hold the other ingredients. Don’t worry if they don’t fit perfectly; a little overlap is fine. The goal is to create a nice, sturdy foundation for your s’more.
4. **Add the Chocolate and Marshmallows:** On top of your Teddy Graham base, strategically place your broken Hershey chocolate pieces. Again, aim for 2-3 squares per bag. Next, add a generous handful of miniature marshmallows. Don’t overstuff the bag; you want to be able to close it easily. The miniature marshmallows are key here because they are the perfect size to melt and gooey up when the s’more is “cooked” by simply sitting and warming up. Distribute them evenly over the chocolate so that each bite gets a good mix of flavors.
5. **Seal and Prepare for “Cooking”:** Once you have your Teddy Grahams, chocolate, and marshmallows in the bag, carefully seal it. Ensure that the bag is properly closed to prevent any of the delicious contents from escaping. To “cook” your s’mores and achieve that perfect melty gooeyness, you’ll want to let them sit in a warm environment. The best way to do this is to place the sealed bags in a warm location. If you are outdoors, the sun is your best friend! Lay the bags on a flat surface in direct sunlight for about 10-20 minutes. The warmth will gently melt the chocolate and soften the marshmallows, creating that classic s’more experience. If you don’t have access to direct sunlight, you can also place them in a car that’s been warmed up by the sun, or even near a gentle heat source (like a cozy fire pit, but not directly in the flames!) for a short period. The key is gentle, indirect warmth.
Enjoy your delicious, portable Walking S’mores! They are best enjoyed shortly after they’ve had a chance to warm up and melt. This recipe is a fantastic way to enjoy a beloved treat in a convenient and mess-free way. Happy snacking!
Conclusion:
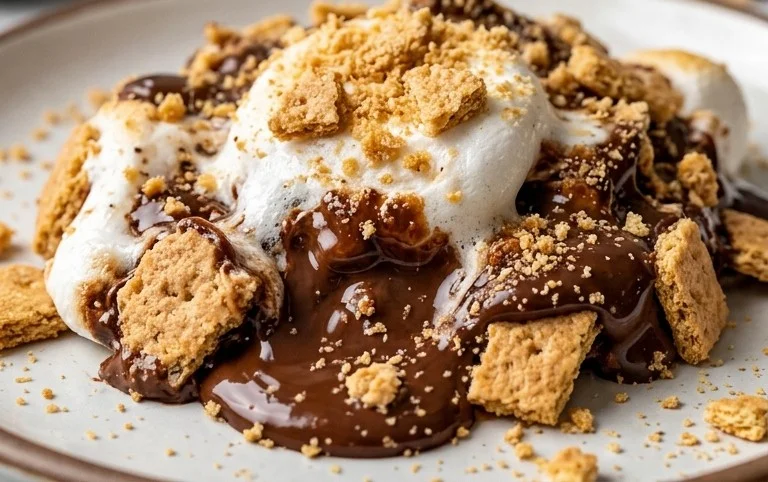
There you have it! Our Walking S’mores recipe, also known as s’mores in a bag, is the ultimate crowd-pleaser and an incredibly easy way to enjoy the classic campfire treat without the fuss of open flames. It’s perfect for parties, movie nights, or simply a fun afternoon activity with kids. The beauty of this recipe lies in its simplicity and adaptability. You get all the gooey, chocolatey, marshmallowy goodness of traditional s’mores, but in a portable, individual package that minimizes mess and maximizes enjoyment. I absolutely encourage you to give this delightful
Walking S’mores recipe
a try!
Serve these delightful treats warm, straight from the microwave, or let them cool slightly for a less melty, but still delicious experience. They are fantastic on their own, but consider pairing them with a cold glass of milk or a mug of hot chocolate for the ultimate comfort food pairing. For even more fun, experiment with variations! Try adding a sprinkle of cinnamon, a few mini chocolate chips in addition to the bar, or even a drizzle of peanut butter sauce before sealing the bags.
Frequently Asked Questions:
Can I make these ahead of time?
While they are best enjoyed fresh from the microwave to experience that perfect gooeyness, you can assemble the ingredients in the bags ahead of time. Store the sealed bags in a cool, dry place and microwave them just before serving for optimal results.
What kind of bags should I use?
For this recipe, standard brown paper lunch bags work perfectly. Ensure they are not the wax-coated kind, as these are not microwave-safe. These simple bags are ideal for creating individual portions of your Walking S’mores.
Can I use different types of chocolate?
Absolutely! While a classic milk chocolate bar is traditional, feel free to get creative. Dark chocolate, white chocolate, or even flavored chocolate bars can add an exciting twist to your s’mores.
Walking S’mores (S’mores in a Bag)
A fun and portable take on the classic s’mores, perfect for camping or parties. Everything is combined in a bag for easy assembly and enjoyment.
Ingredients
-
7 Teddy Grahams Snack Packs
-
1 cup miniature marshmallows
-
3 Hershey chocolate bars
-
1/4 cup crushed graham crackers (from extra snack packs)
-
1 tablespoon butter
Instructions
-
Step 1
Empty the contents of the Teddy Grahams Snack Packs into a resealable bag. -
Step 2
Break the Hershey chocolate bars into smaller pieces and add them to the bag. -
Step 3
Add the miniature marshmallows to the bag. -
Step 4
Add the crushed graham crackers and melted butter to the bag. (Melt butter in a small microwave-safe bowl for about 15-20 seconds). -
Step 5
Seal the bag tightly and shake vigorously until all ingredients are well combined. -
Step 6
Allow the mixture to sit for a few minutes to let the residual heat from the butter slightly soften the chocolate and marshmallows, or enjoy immediately for a no-bake treat.
Important Information
Nutrition Facts (Per Serving)
It is important to consider this information as approximate and not to use it as definitive health advice.
Allergy Information
Please check ingredients for potential allergens and consult a health professional if in doubt.