Homemade Pickled Banana Peppers-Tangy & Crisp
Pickled banana peppers are one of those culinary gems that instantly transport me to summer picnics and vibrant deli sandwiches. There’s something undeniably special about their bright, tangy crunch that elevates almost any dish. Why do we love them so much? It’s their perfect balance: a mild heat that tickles the palate without overwhelming, coupled with a delightful sweet-and-sour brine that’s utterly addictive. These aren’t just any peppers; pickled banana peppers possess a unique sweetness that sets them apart, making them a versatile star in everything from salads and pizzas to burgers and charcuterie boards. They offer a refreshing counterpoint to richer flavors and a welcome burst of zest. If you’ve ever wondered how to capture that irresistible flavor at home, you’re in the right place. Get ready to discover the simple joy of making your own delicious pickled banana peppers!
Pickled Banana Peppers
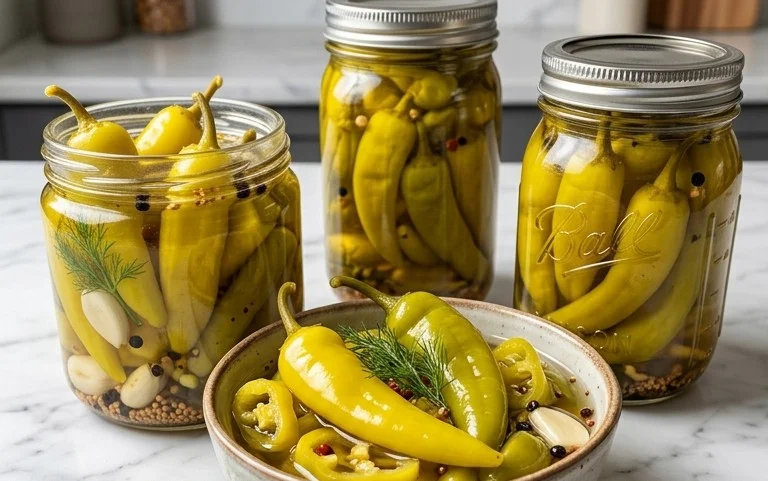
There’s something incredibly satisfying about a perfectly pickled banana pepper. Their bright, tangy flavor and crisp texture can transform a simple sandwich, elevate a pizza, or add a zesty kick to a charcuterie board. Forget those mass-produced jars; making your own pickled banana peppers at home is surprisingly simple and allows you to control the exact level of spice and tang. This recipe delivers a delightful balance of sweetness, acidity, and savory aromatics that will have you reaching for them again and again. Plus, the vibrant yellow-green hue of these peppers is just so cheerful!
Ingredients:
- 1 lb banana pepper (sliced)
- 1 cup white vinegar 5% or apple cider vinegar 5%
- 1 cup of water
- 2 tsp salt
- 3 tsp sugar
- 10-12 garlic cloves
- 3 tsp mustard seeds
- 2 tsp whole black pepper
- 2 tsp coriander seeds
Instructions:
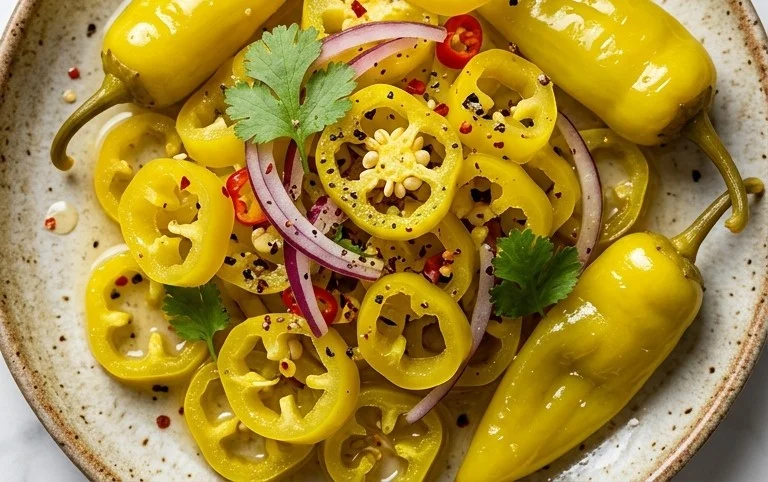
1. **Prepare Your Peppers and Jars:** First things first, we need to get our star ingredient ready. Wash your banana peppers thoroughly. Trim off the stems and then slice them into rounds, about ¼ inch thick. If you prefer them less spicy, you can remove the seeds and membranes before slicing. For this recipe, I like to leave some of the seeds in for a little extra punch. While you’re prepping the peppers, make sure you have clean jars ready. I typically use pint-sized mason jars for this. Wash them well with hot, soapy water and rinse them thoroughly. You can also run them through a dishwasher cycle for extra sterility. It’s important to have clean jars to ensure your pickles have a good shelf life.
2. **Create the Brine:** This is where all the magic happens! In a medium saucepan, combine the white vinegar (or apple cider vinegar – both work beautifully and offer slightly different flavor profiles, so choose your favorite!), water, salt, and sugar. Stir everything together until the salt and sugar are completely dissolved. If using a non-reactive pot, like stainless steel or enamel, this step is straightforward. Bring this mixture to a boil over medium-high heat. Once it reaches a rolling boil, reduce the heat slightly and let it simmer for about 5 minutes. This simmering time allows the flavors to meld and ensures the salt and sugar are fully incorporated. Don’t skip this step; it’s crucial for developing the perfect balance of sweet and sour.
3. **Infuse with Aromatics:** Now, let’s add those wonderful aromatic elements that give pickled peppers their signature flavor. To your boiling brine, add the peeled garlic cloves (I like to give them a light smash with the side of my knife to release more of their flavor, but you can also leave them whole), mustard seeds, whole black peppercorns, and coriander seeds. Give the brine a good stir. Let it simmer for another 2-3 minutes. This allows the heat to gently extract the essential oils and flavors from the spices and garlic, infusing the brine with a complex and delicious aroma. The smell at this stage is incredible and hints at the deliciousness to come!
4. **Pack the Jars:** Carefully remove the saucepan from the heat. Now it’s time to pack your prepared banana pepper slices into your clean jars. I like to start by placing some of the garlic cloves and spices at the bottom of each jar, then layering in the sliced peppers. Pack the peppers in fairly snugly, but don’t mash them down. Leave about ½ inch of headspace at the top of each jar. This headspace is important for proper sealing if you plan to can them, or just to prevent overflow during the pickling process. Once the peppers are packed, carefully ladle the hot brine over them, ensuring all the peppers are submerged. You want to make sure the brine covers the peppers completely.
5. **Cool, Seal, and Pickle:** After filling the jars with the hot brine, gently tap the sides of the jars to release any trapped air bubbles. You can also use a clean chopstick or skewer to gently run around the inside of the jar. Wipe the rims of the jars clean with a damp cloth to ensure a good seal. Place the lids on the jars and screw on the bands fingertip-tight. If you are planning to can these for longer shelf-life, follow proper canning procedures. However, for a quick pickle that you’ll enjoy within a few weeks, simply let the jars cool completely on the counter. Once cooled, transfer the jars to the refrigerator. Your pickled banana peppers will be ready to enjoy after at least 24-48 hours, but they really shine after a week or two, allowing the flavors to fully develop and meld. The longer they sit, the more intense and delicious they become! Enjoy your homemade pickled banana peppers on sandwiches, salads, or straight from the jar!
Conclusion:
And there you have it – a simple yet incredibly rewarding recipe for homemade pickled banana peppers! I truly believe this recipe is a kitchen game-changer because it allows you to control the brine’s flavor profile, ensuring a delicious tang and just the right amount of heat. Plus, the vibrant color and satisfying crunch of these pickled peppers are simply unmatched. I can’t wait for you to experience the joy of pulling a jar of these beauties from your own refrigerator.
These pickled banana peppers are incredibly versatile. They’re fantastic as a topping for pizzas, sandwiches, burgers, and even hot dogs. Don’t be afraid to chop them up and add them to your salads or pasta dishes for an extra punch of flavor. They also make a wonderful accompaniment to charcuterie boards and can be served alongside grilled meats or fish.
If you’re feeling adventurous, there are plenty of ways to customize this recipe. Consider adding a pinch of red pepper flakes for extra heat, a few dill sprigs for an herbaceous note, or even some whole garlic cloves to the brine. Experimenting with different vinegars, like apple cider vinegar, can also yield delightful results.
So please, I encourage you to give this pickled banana pepper recipe a try. It’s a rewarding culinary adventure that will elevate your meals and impress your friends and family. Enjoy the process and savor the delicious outcome!
Frequently Asked Questions:
How long do these pickled banana peppers last?
Properly stored in the refrigerator in an airtight container, your pickled banana peppers should stay fresh and delicious for at least 4-6 weeks, though many people find they are best enjoyed within the first month for optimal flavor and texture.
Can I make these pickled banana peppers spicier?
Absolutely! For a spicier kick, you can easily increase the amount of red pepper flakes in the brine. You could also consider adding a whole dried chili pepper or two to the jar before sealing it. Taste your brine as you make it and adjust the spice to your personal preference.
What’s the difference between pickled banana peppers and other pickled peppers?
Banana peppers are known for their mild to moderate heat and slightly sweet, fruity flavor, which makes them ideal for pickling. They have a tender flesh that absorbs brine beautifully without becoming mushy. Other pickled peppers, like jalapeños or serranos, will have a significantly higher heat level and a different flavor profile.
Pickled Banana Peppers
Tangy and slightly sweet pickled banana peppers, perfect for sandwiches, salads, or as a side.
Ingredients
-
1 lb banana pepper, sliced
-
1 cup white vinegar 5%
-
1 cup of water
-
2 tsp salt
-
3 tsp sugar
-
10-12 garlic cloves, smashed
-
3 tsp mustard seeds
-
2 tsp whole black pepper
-
2 tsp coriander seeds
Instructions
-
Step 1
Wash and slice the banana peppers, discarding stems and seeds if desired. Smash the garlic cloves. -
Step 2
In a medium saucepan, combine the white vinegar, water, salt, and sugar. Stir until the salt and sugar are dissolved. -
Step 3
Add the mustard seeds, whole black pepper, and coriander seeds to the vinegar mixture. Bring to a simmer over medium heat and cook for 2-3 minutes. -
Step 4
Place the sliced banana peppers and smashed garlic cloves into clean jars. Pack them fairly tightly but not so much that they cannot absorb the brine. -
Step 5
Carefully pour the hot brine over the peppers and garlic in the jars, ensuring they are fully submerged. Leave about 1/2 inch of headspace at the top. -
Step 6
Let the jars cool to room temperature on the counter. Once cooled, seal the jars tightly and refrigerate. Pickles will be ready to eat after at least 24 hours, but are best after a few days.
Important Information
Nutrition Facts (Per Serving)
It is important to consider this information as approximate and not to use it as definitive health advice.
Allergy Information
Please check ingredients for potential allergens and consult a health professional if in doubt.